Note
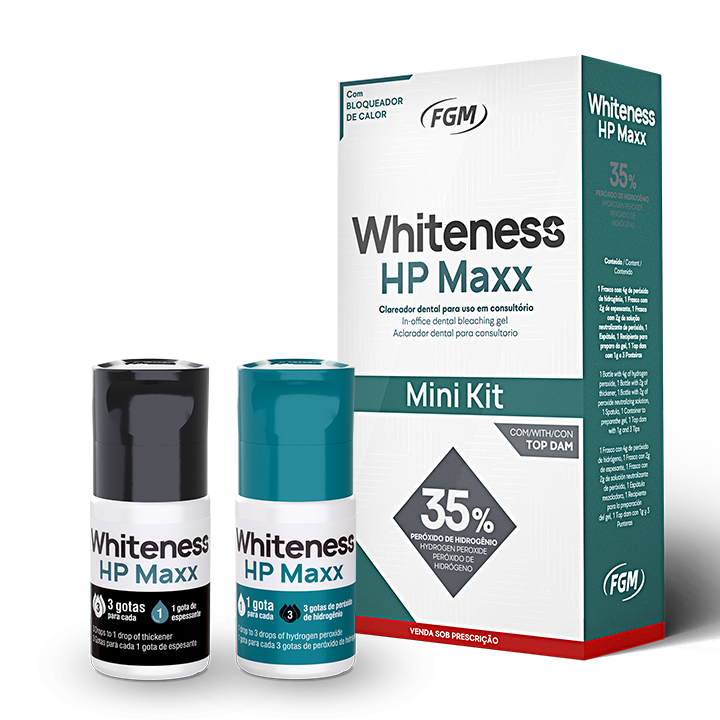
To prevent possible dental hypersensitivity during and after treatment, Desensibilize KF2% (FGM) (5% potassium nitrate and 2% sodium fluoride) may be used before the whitening, in a prophylactic way. The option of applying the desensitizer after whitening is also valid, but less effective in certain cases. In both cases (before or after application of the whitening gel), Desensibilize KF2% (FGM) must be applied to the teeth for 10 minutes. In cases of high hypersensitivity after the session, Desensibilize 0.2% (FGM) (desensitizer for at-home use) may be applied by the patient in the tray and used for 10 minutes daily until the symptoms subside.


![foto-1-31-300x200[1]](https://fgmdentalgroup.com/wp-content/uploads/2022/11/foto-1-31-300x2001-2.jpg)
![foto-2-31-300x200[1]](https://fgmdentalgroup.com/wp-content/uploads/2022/11/foto-2-31-300x2001-2.jpg)
![foto-3-24-300x200[1]](https://fgmdentalgroup.com/wp-content/uploads/2022/11/foto-3-24-300x2001-2.jpg)
![foto-4-20-300x200[1]](https://fgmdentalgroup.com/wp-content/uploads/2022/11/foto-4-20-300x2001-2.jpg)
![foto-5-15-300x200[1]](https://fgmdentalgroup.com/wp-content/uploads/2022/11/foto-5-15-300x2001-2.jpg)
![foto-6-11-300x200[1]](https://fgmdentalgroup.com/wp-content/uploads/2022/11/foto-6-11-300x2001-2.jpg)
![foto-7-8-300x200[1]](https://fgmdentalgroup.com/wp-content/uploads/2022/11/foto-7-8-300x2001-2.jpg)
![foto-8-4-300x200[1]](https://fgmdentalgroup.com/wp-content/uploads/2022/11/foto-8-4-300x2001-2.jpg)
![RX-1-205x300[1]](https://fgmdentalgroup.com/wp-content/uploads/2022/11/RX-1-205x3001-2.jpg)
![foto-1-32-300x209[1]](https://fgmdentalgroup.com/wp-content/uploads/2022/11/foto-1-32-300x2091-2.jpg)
![foto-2-32-297x300[1]](https://fgmdentalgroup.com/wp-content/uploads/2022/11/foto-2-32-297x3001-2.jpg)
![foto-3-25-300x200[1]](https://fgmdentalgroup.com/wp-content/uploads/2022/11/foto-3-25-300x2001-2.jpg)
![foto-4-21-300x260[1]](https://fgmdentalgroup.com/wp-content/uploads/2022/11/foto-4-21-300x2601-2.jpg)
![foto-5-16-300x293[1]](https://fgmdentalgroup.com/wp-content/uploads/2022/11/foto-5-16-300x2931-2.jpg)
![foto-6-12-300x287[1]](https://fgmdentalgroup.com/wp-content/uploads/2022/11/foto-6-12-300x2871-2.jpg)
![foto-7-9-300x251[1]](https://fgmdentalgroup.com/wp-content/uploads/2022/11/foto-7-9-300x2511-3.jpg)
![kit-hp_automixx[1]](https://fgmdentalgroup.com/wp-content/uploads/2022/11/kit-hp_automixx1.png)