Important Notes
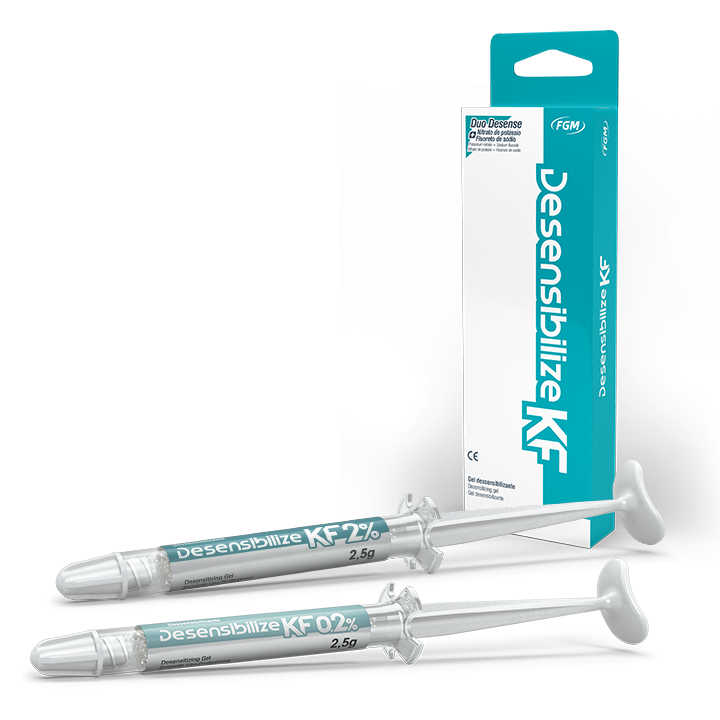
To prevent dental hypersensitivity during and after treatment, Desensitize KF2% (FGM) (potassium nitrate at 5% and sodium fluoride at 2%) may be used prior to whitening, in prophylactic character. The option of applying the desensitizer after whitening is also valid, however less efficient in certain cases. In both cases (prior to or after applying the whitener), Desensitize KF2% (FGM) should be applied to the teeth for 10 minutes. In cases of high hypersensitivity after the session, Desensitize 0.2% (FGM) (at-home use desensitizer) may be applied for 10 minutes into an individual mold, by the patient, on daily basis until the symptoms disappear.


![foto-1-9-300x200[1]](https://fgmdentalgroup.com/wp-content/uploads/2022/11/foto-1-9-300x2001-3.jpg)
![foto-3-8-300x200[1]](https://fgmdentalgroup.com/wp-content/uploads/2022/11/foto-3-8-300x2001-2.jpg)
![foto-2-13-300x200-300x200[1]](https://fgmdentalgroup.com/wp-content/uploads/2022/11/foto-2-13-300x200-300x2001-1.jpg)
![foto-4-1-3-300x200[1]](https://fgmdentalgroup.com/wp-content/uploads/2022/11/foto-4-1-3-300x2001-2.jpg)
![foto-5-1-3-300x200[1]](https://fgmdentalgroup.com/wp-content/uploads/2022/11/foto-5-1-3-300x2001-4.jpg)
![foto-6-3-300x200[1]](https://fgmdentalgroup.com/wp-content/uploads/2022/11/foto-6-3-300x2001-2.jpg)
![foto-7-2-300x200[1]](https://fgmdentalgroup.com/wp-content/uploads/2022/11/foto-7-2-300x2001-2.jpg)
![foto-8-300x200[1]](https://fgmdentalgroup.com/wp-content/uploads/2022/11/foto-8-300x2001-2.jpg)
![foto-9-300x200[1]](https://fgmdentalgroup.com/wp-content/uploads/2022/11/foto-9-300x2001-2.jpg)

![kit-hp_automixx[1]](https://fgmdentalgroup.com/wp-content/uploads/2022/11/kit-hp_automixx1.png)